In ViralDashboard you can Create and Setup Automation Triggers to Publish and Schedule Contents from your Connected Sources automatically.
Steps to Create Automation Trigger
Step 1: Login to your ViralDashboard account.
Step 2: On the left side menu of the Dashboard, navigate to Automations, and click on Create New Automation.

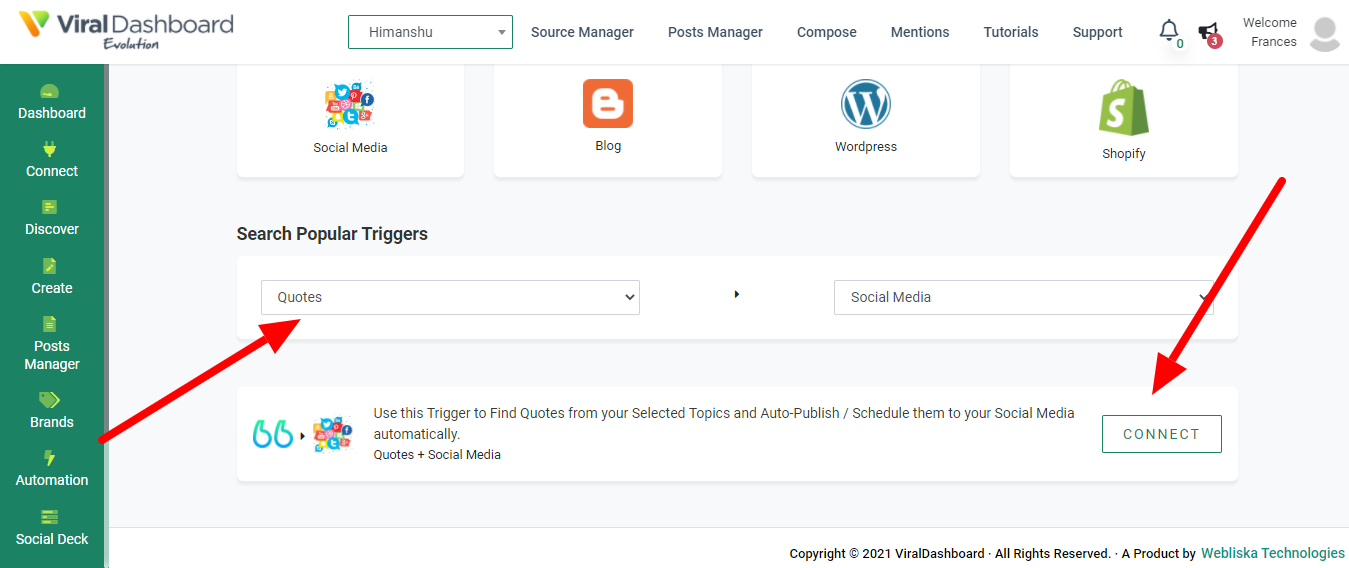
Step 3: Now, you will be redirected to the Automation Trigger page. Here you will see various platforms which you can connect to ViralDashboard via Content Connector like RSS Feeds, Video Platforms, Blogs, and many more. Just navigate to the "Search Popular Triggers" section and select your Triggers.
Step 4: After this, you will see your selected trigger below with the Connect button. Now you have to click on the Connect button.
Step 4: After clicking on the Connect, a pop-up box will appear where you need to first enter the name of your Trigger and then you have to select your connected accounts. After this, click on Create Trigger button. See the image below.
NOTE: You can only create Automation on Facebook Pages, Twitter Accounts, and LinkedIn Organisations.

Step 5: Now, you have to fill in the Scheduling details like Post Day - Every day or any specific day of the week. When to Publish - Time to publish the content. Trigger Expiry Date - For how long the trigger will be active. After this the detail according to your selected trigger like Type for Quotes, links for RSS feeds, and others. And finally, click on the Save Trigger button.

Step 6: Now your trigger is created and you will be redirected to the Manage Automations page. You can edit your created Triggers form here.
This is all for this tutorial. If you have any questions, please contact the support team via email.
Was this article helpful?
That’s Great!
Thank you for your feedback
Sorry! We couldn't be helpful
Thank you for your feedback
Feedback sent
We appreciate your effort and will try to fix the article